PIC32 Prototyping

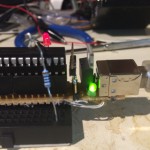
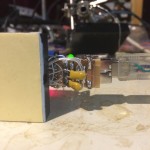
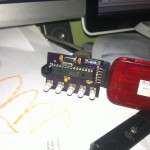
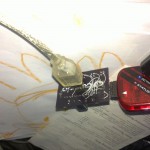
I’ve been thinking for a while that prototyping stuff with the DIP PIC32 parts should be easier, so I built something over the weekend to make that a reality. 

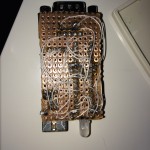
Instead of this:

IMG_0103

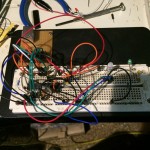
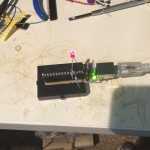
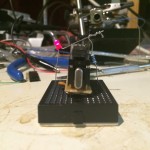
I can now start with this:

IMG_0099IMG_0102IMG_0100IMG_0101

It is just the bare minimum to get a DIP PIC32 part up and running with USB support.  I’m pretty happy with the results so far.  Now all I need to do is get a USB boot loader that fits in under 3Kb and I can use the Chipkit32 stuff with these little guys 😉


Dissapointment

I wanted to play Turrican 2 the other day so I fired up an Amiga emulator, but playing it via the keyboard really wasn’t cutting it, so I broke out a USB game pad I had floating around the place.  That also didn’t feel quite right 🙁  What I needed was an old Atari style joystick to really get my Turrican 2 craving licked.  I looked around and sure enough I had one, but how could I get it working with my Mac?  I needed an Atari joystick adapter.  A little googling and ebaying later I found that 1. they are pretty easy to make, and 2. those available online are too expensive.  Time to break out the soldering iron and whip one up myself.  The hardware is pretty simple, just a PIC32MX220F32B and a handful of other components.
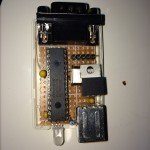
IMG_0075 IMG_0076

I even found a nice box to put it into!
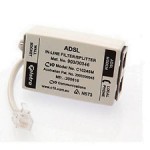
n573

Once I’d removed the guts of the ADSL filter, it had just enough room to fit all the parts I needed 🙂

After coding up a simple HID based USB joystick (and forgetting yet again that the reason I couldn’t read some of the bits in PORTB was due to the analog inputs being enabled by default) I had a working USB joystick adapter.  Time to play Turrican 2!

FRAK!  Why can’t I jump?!?  It turns out the plastic shaft inside the joystick has a crack in it which means that the UP direction doesn’t work reliably making Turrican 2 unplayable 🙁

I think I have another Atari style joystick about the place, but if not, it looks like ebay may be my only option 🙁

Ah well, I had fun anyway 🙂


Objective-C to Java and back again via JNI and Unix pipes

I’ve been working on a piece of software for some time now that is almost ready for a public release.  For part of it I needed to connect to various databases, some of which are only accessible via JDBC.  My problem is that my app is written in Objective-C.  For the first version of my app this wasn’t a problem as Apple was promoting their brand new Objective-C to Java bridge and everything worked really nicely.  That was until a couple of years ago when Apple decided to deprecate the Java bridge.  I rewrote that code to use JNI and all was good.  Then Apple brought out the Mac App store but announced that it would not accept any apps that link directly to the JVM.  This causes a problem for me as without the JDBC drivers the usefulness of my app is greatly reduced.

I looked into various ways of embedding the JVM into my app, but the problem with doing that was that it increased my app from less than 10Mb to around 100Mb.  I wasn’t too happy about that to say the least, so I looked into providing a way to make my app optionally use the system JVM allowing the Java support to be turned off.  This worked pretty well unless the machine didn’t have a JVM installed in which case my app would refuse to load due to linkage failures.  So, I had the bright idea to use Apples “new” XPC feature.  I reorganised my JNI code to allow it to be called from an XPC process and found that the security settings meant that the JVM could not access any of the JDBC driver files in my app bundle. I got around that by using a folder shared with a process group.  This allows the JDBC drivers to be loaded, but then I found that for some reason the JNI code that had been running very nicely for a couple of years didn’t like running inside an XPC process and would fail randomly with strange errors.  On top of that I found that the process of going from Java, through JNI to Objective-C, then from the XPC process over to the main app was very slow and was especially noticeable with some of my larger data sets.

In desperation I decided to abandon the JNI code altogether and see if I could communicate from the main app to the java code in some other way.  In the end I created a Java JDBC connector that communicates with the main app via a pair of Unix pipes.  I have found this to amazingly fast and extremely reliable.  Instead of the data going through several transformations from Java, through to JNI and then to Objective-C and so on it now goes directly from the Java code in a special serialised format directly into the Objective-C code via the pipes.  It works really well 🙂

More Yealink VP-2009 stuff

I have to admit is a little disappointed with the phone when I got it.  I updated the firmware as far as it would allow me, but the more recent versions of the software would not install 🙁  After a bit of googling I found that there was supposedly a procedure for updating the old firmware to one of the newer sets, but that it was a secret.  That got me really interested so I dug a little deeper.  I found a PDF that contained a link to a Yealink FTP server which I’m not sure is supposed to be publicly available.  On the FTP server was a set of files that detailed in rather broken English the process.  Basically you put the phone into a special mode that causes it to download a new firmware from a TFTP server running on the same network and off it goes with the new firmware.

My phone now says is has firmware version 23.70.0.66 and it now has all the features I was hoping to get.  From what I can see it now has pretty much the same software as the new VP530.

Happy now 🙂

I also tested the technique used to get root on the old firmware and it is no longer available, however the technique used for the T38G now works.

Yealink VOIP phone back doors

vp2009

Yesterday I took delivery of a Yealink VP-2009 VIOP phone.  I was hoping it would be a nicer phone than it actually turned out to be.  I have a Yealink T38G and was really happy with it.  Unfortunately a lot of the features I like in the T38G are not present in the VP-2009. Ah well, live and learn I guess 😉

To the meat of it.  When I plugged the new VP-2009 in to my network and attempted to configure it there was a weird caching issue with my browser as it took the same IP address as the old T38G which resulted in an error page being shown.  Initially I thought the phone by broken in some strange way, so I started to investigate a firmware download for the phone.  After extracting the firmware using binwalk I found the HTML for the web interface and found that there is a back door that allows arbitrary commands to be executed on the phone.  The first thing I did was remove the password on the root user (passwd -d root) so I was able to telnet into the device.  Once on the device I was able to poke around and see all sorts of interesting stuff.

I was interested to see if there was anything like this back door in the T38G.  It turns out there is, although it isn’t as easy to use as the one in the VP-2009.  There is a hidden page that allows the telnet server to be turned on, and the same code can be exploited to remove the root user password 🙂

It’s alive!

I spent a little time on my lunch break putting in the last few wires and the board has come up 🙂

The flash from my phone has drowned out the LEDs on the board, but they were blinking as they should.

Since I didn’t have another voltage regulator handy I have used the voltage drop across two diodes from a bridge rectifier (a trick I’ve used successfully before with other 3.3v parts from Microchip).

Some more pictures of the failed boards

I took a few more pictures of the failed boards and sent them to the fantastic people at circuits.io.  They have very generously offered to send me new ones at no charge 🙂  Hopefully these new boards will work out.

I also had a quick go at getting one of the boards working.  After soldering lots of wires on the bottom of the board I powered it up and let the magic smoke out of my voltage regulator, so it looks like I may have a crook connection somewhere.  It could also be because I didn’t have the right regulator available so tried another with a slightly different pinout.  I put some heat shrink over the input lead and bent it into the right position. Maybe I didn’t get it quite right.  The interesting thing is that the Mac I had it plugged in to didn’t complain about the device drawing too much current, so I don’t quite know what went wrong.  Time to head out to Jaycar and get the part I actually need I guess 😉